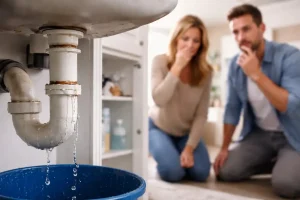
Step into any quiet Tasmanian house and you might hear it: that midnight drip… drip… of a faucet. Even a tiny leak is a drain on both your peace of mind and your hip pocket. In fact, one old poster puts it bluntly: “Small leaks may become big losses”. Ignoring a constant drip can waste over 24,000 litres of water a year. That’s roughly 65 L per day!
Fixing a dripping faucet doesn’t require a plumbing degree – just a bit of know-how, some basic tools, and confidence. In this guide we’ll walk through step-by-step dripping faucet repair, so you can silence that drip and save water and money. Along the way I’ll share tips, anecdotes, and even a touch of Aussie humour. Let’s grab the wrench and get started!
Why a Dripping Faucet Demands Attention
A leaky tap may seem like a minor inconvenience, but the impact adds up quickly—especially in Tasmania, where water security is becoming increasingly important. In 2025, the state experienced its driest April in ten years, leading to water restrictions across several regions. In a climate like this, every saved drop helps protect both the environment and your wallet.
Plumbing experts often remind homeowners that a dripping tap isn’t just annoying—it’s a constant sign that water is being wasted. Even a slow, steady drip can lose up to 50 litres of water per day. Over the course of a year, that’s around 18,000 litres, equivalent to roughly nine average showers.
Repairing a dripping faucet early prevents these hidden losses. Fixing the issue—often as simple as replacing a worn washer—reduces your water bill, eases demand on Tasmania’s water supply, and restores peace and quiet in your home. Dripping faucet repair Many homeowners find leak repairs straightforward, typically requiring only basic tools and a quick visit to a hardware store. And if the leak is coming from a hot tap, you also avoid unnecessary energy use as heated water goes down the drain.
Ultimately, an unrepaired drip is like letting money flow straight into the sink. As one Canadian water authority highlights, “A leaking tap can waste up to 50 litres of water a day.” In Tasmania’s increasingly dry conditions, that wasted water becomes even more significant. Addressing leaks promptly ensures that each drop is put to good use and turns that constant “drip… drip…” into a simple, satisfying “fixed

Common Culprits: Why Taps Drip
Before diving into repairs, let’s diagnose why the tap is leaking. Most leaks come from a few common causes:
- Worn-out washers or O-rings. These little rubber seals keep the tap watertight. Over time they harden, crack or crumble, letting water sneak out. Replacing the washer or O-ring is often enough to fix the drip.
- Corroded valve seat. Where the tap’s moving parts meet the spout is called the valve seat. Mineral deposits or rust can build up here in Tasmanian water, preventing a tight seal.
- Loose components. After years of use, screws or fittings may loosen. Even a slightly loose packing nut or seat can cause a persistent leak.
- High water pressure. Too much pressure can stress seals and joints, causing leaks at the weakest point.
Think of your faucet like a well-used machine—when small internal parts wear out, leaks begin. The most common causes of a dripping faucet are loose hardware, worn washers, damaged O-rings, or faulty cartridges. Inspecting these components is the first step in diagnosing the leak. For instance, if the faucet drips only when it is turned off, the problem is often a deteriorated washer that can no longer create a tight seal. If the drip occurs when a specific handle is on, the issue may lie in the O-ring or the cartridge inside that handle. Identifying the exact behavior of the leak helps determine the right repair quickly and accurately.
Tools & Prep for DIY Faucet Repair
Ready to roll up your sleeves? Dripping faucet repair only needs a few basic tools and parts. Gather these before you start:
- Adjustable wrench or basin wrench: To loosen nuts under the sink.
- Screwdrivers (flat-head and Philips): For removing handles and other fittings.
- Allen keys: Some modern taps use hex screws.
- Replacement parts: Pick up a faucet repair kit at Bunnings – it will include common washers, O-rings and seals.
- Plumber’s tape (PTFE tape): Ensures a tight seal on threaded connections.
- Cloth or rag: To prevent scratches and catch drips.
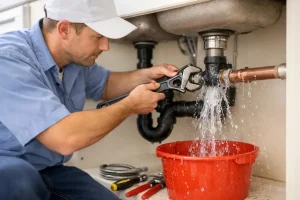
- Bucket or towel: To catch any residual water when you open the faucet.
Set the scene: turn off the water supply to that tap. There should be a shut-off valve under the sink – twist it clockwise until tight. Open the faucet to make sure all water is drained. Place a rag over the drain so small parts don’t fall in.
Step-by-Step Dripping Faucet Repair
Time to get hands-on. Follow these steps carefully to fix the leak. We’ll assume a typical domestic tap (compression type), but many ideas apply to other faucets too.
- Turn off water and open tap. As above, shut the valve and open the faucet fully to let remaining water drain away.
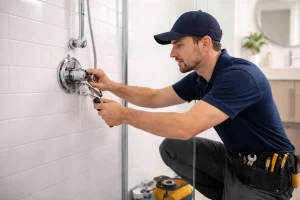
- Remove the faucet handle. Most taps have a small cap or screw under the handle. Pry off the cap (usually plastic) with a screwdriver to expose a screw, then remove it. Pull the handle off – you might need pliers if it’s stiff.
- Unscrew the packing nut or bonnet. Just below the handle you’ll find a large nut (the bonnet or packing nut). Use your wrench to loosen this nut counterclockwise. Dripping faucet repair This allows you to pull out the valve stem or cartridge.
- Inspect internal parts. Look at the valve stem and the bit you pulled out. The rubber washer at the bottom is often the leak culprit. Also check the small O-ring on the stem and the valve seat in the faucet body for damage or debris.
- Replace bad parts: Take the old washers/O-rings to the hardware store and match them. Slide the new washer onto the stem and put on a fresh O-ring if available. If the valve seat is corroded, you might need a seat-dressing tool or to replace the entire cartridge.
- Apply plumber’s tape (if threaded). If your faucet has threaded connections, wrap a couple of turns of PTFE tape around any exposed threads for a watertight seal.
- Reassemble the faucet. Place the stem back into the faucet body. Screw the packing nut back on firmly. Reattach the handle and tighten its screw.
- Turn water back on and test. Slowly open the shut-off valve and then turn on the faucet. Watch closely for leaks. It may hiss or sputter at first – that’s just air escaping. Finally, turn the tap off and make sure the dripping has stopped. If you still see a drip, recheck the parts or tighten as needed.
See that single droplet? It’s often a sign that the internal washer or seal needs replacing. Our simple repair will stop the drip and have that faucet running like new again. If all went well, you’ve nailed your first dripping faucet repair! Pat yourself on the back – you just saved thousands of litres of water and the cost of a service call.
Common Faucet Fixes
|
Leak Issue |
Likely Cause |
DIY Fix |
|
Tap drips constantly even when off |
Worn rubber washer or O-ring | Replace the washer/O-ring; retighten parts |
|
Tap only drips on one handle side |
Faulty cartridge or O-ring |
Swap out the cartridge or O-ring (new part) |
|
Water around faucet base |
Loose packing nut or seal |
Tighten packing nut; replace sealing washer |
| High-pitched whine or leak under sink | Bad shut-off valve or loose fitting |
Replace/check shut-off valve; tighten joints |
Table: Match your faucet’s behavior to common causes (and the quick fixes).
Tips and Tricks from Plumbing Pros
- Work patiently. Faucets can be sneaky if things look complicated, take notes or photos to remember how pieces go back together.
- Mind the parts. Keep small pieces in a tray or on a cloth so nothing vanishes down the drain.
- Don’t over-tighten. Cracking porcelain or stripping threads is easy if you grunt too hard. Tighten snugly and test before maxing the torque.
- Clean as you go. Vinegar with a cloth can dissolve mineral deposits on the valve seat. A clean surface seals better.
- Consider eco-friendliness. Pick rubber washers (instead of lead parts) and water-saving aerator inserts. Dripping faucet repair Every drop counts in sustainable Tasmanian living.
If at any point you feel out of depth – maybe the tap is old and brittle, or the leak persists – it’s wise to call in a pro. Dripping faucet repair Tasmanian plumbers are great people; a small fee will be worth the fix and peace of mind.
When to Call a Professional
Sometimes DIY only gets you so far. Consider a plumber when:
- The leak won’t stop. If you’ve replaced washers and still have a drip, it might be a faulty cartridge or unseen pipe issue.
- It’s a complex tap. Multi-handle mixers, thermostatic taps, or designer fittings can be tricky without experience.
- Rust or damage is extensive. Severe corrosion or broken parts mean a professional can better ensure safety and durability.
- Water is gushing. An uncontrollable leak or burst pipe needs immediate pro attention.
In short, don’t force it. If tightening and swapping parts fail, you’ll save time by dialing a local plumber.
In Summary
Fixing a dripping faucet is one of those small home jobs that pays big dividends. According to the Director’s Determination – Categories of Plumbing Work, many minor tasks like this can be handled by homeowners themselves. By following the steps above, you can manage most leaks on your own – saving litres of water, dollars on the bill, and a lot of irritation from that steady drip-drip. Remember: even a minor drip is a clue your tap needs attention.
In Tasmania’s water-wise environment, every fix is a win for your home and community. So, time to put your toolkit to work! Give that faucet the repair it deserves, and enjoy the quiet you might even look forward to bragging to your mates that you fixed it.
If you found these tips helpful, share this guide. And if you’re still hearing a trickle after trying this yourself, don’t hesitate to call in a Tasmanian plumbing pro. They’ll keep your water flowing where it belongs – into your glass, not your sink.
FAQs:
-
How do I stop a dripping faucet?
Turn off the water supply, disassemble the faucet, and inspect parts. Most drips are fixed by replacing worn washers or O-rings. Tighten everything back up and test the tap.
-
What tools do I need to fix a leaky tap?
Gather an adjustable wrench, screwdrivers, replacement washers/O-rings, and plumber’s tape. A basin wrench helps under-sink. These basic tools let you perform most dripping faucet repairs.
-
How much water does a dripping tap waste?
Even a slow drip can add up. In fact, a single leaking tap may waste up to about 50 litres per day if left unfixed. It pays to fix that leak quickly