You know that moment when your shower door moans like a blues singer every time you push it? I definitely did last week in Hobart, and boy, it had me imagining a horror movie soundtrack. My solution? Shower door roller replacement! Don’t worry though—it’s totally doable with basic tools and a bit of elbow grease. So grab a cuppa, roll up your sleeves, and let’s gather the gear we need to end that morning shower karaoke.
Replacing shower door rollers sounds technical, but it just takes a bit of patience and the right toolkit. In this guide, we’ll cover everything a Tasmanian DIY-er needs for shower door roller replacement—the must-have tools, step-by-step tricks, and even a few stylistic flourishes to make the process less daunting. By the end, you’ll be sliding that door with ease .
Essential Tools for Shower Door Roller Replacement
Before you start, gather the right gear. You’ll need Phillips and flathead screwdrivers, pliers, a hammer, a pry bar (or sturdy putty knife) and maybe a cordless drill if any screws are stubborn. A level helps ensure the door hangs straight, and don’t skip a silicone spray to lubricate the wheels later. Grab a vacuum or rags too, so you can clean out the track before installing new rollers.
| Tool | Purpose |
|---|---|
| Phillips & Flathead Screwdrivers | Remove and adjust roller screws and brackets |
| Hammer | Gently tap components into place |
| Pliers (needle-nose) | Grip and pull stuck parts |
| Pry Bar / Putty Knife | Pry off panels or old caulk |
| Drill & Bits | Drill out stripped screws (if needed) |
| Level | Ensure the door is hung evenly |
| Replacement Rollers | The new wheels (match the size and type of your old ones) |
| Silicone Lubricant | Keep the wheels and tracks moving smoothly. |
| Vacuum or Broom | Clean out dirt/debris from the track before reassembly |
| Safety Gear (Gloves, Goggles) | Protect hands and eyes during the job |
A close-up of a shower door roller replacement assembly—the little wheel and metal bracket you’ll be swapping out. Guides like Baker Glass actually recommend using a vacuum (or broom) to clear debris after removing the old rollers. Another DIY resource even lists a drill and level as helpful extras. With these tools at the ready, you’re set to tackle the swap.
How to Replace Shower Door Rollers (Step-by-Step)
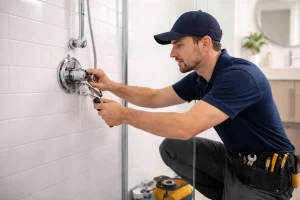
Remove the Shower Door: Fully open the door and have it secured (use a doorstop or enlist a friend). Use your screwdriver to turn the bottom adjustment screws counterclockwise – this raises the door off the track. Tilt the door to detach it from the top rail, then carefully slide it out. (Safety first: the glass can be heavy, so take your time and ask for help if you need it.)
Take Out the Old Rollers: Lay the door flat on a soft surface. Locate the roller brackets on the bottom (and possibly top) edges of the door. Unscrew or unclip the old rollers using your screwdriver or pliers. For shower door roller replacement, if a roller is stuck, a little penetrating oil can help—spray and wait a minute, then gently pry it out.
Clean the Track and Frames: Before installing new parts, clean everything. Vacuum or brush out any grime from the door tracks. Even a speck of sand can make your new rollers bind later. Wipe the track with a damp cloth or rubbing alcohol and let it dry.
Install the New Rollers: Take your fresh rollers for the shower door roller replacement and slide them into the brackets in the same spots as the old ones. Make sure each wheel is oriented correctly and fully seated in its mount. Secure them by tightening the screws or snaps—firmly, but don’t strip the threads.
Rehang and Adjust the Door: Lift the door back into place. Tilt the top under the upper track first, then lower the bottom wheels to the lower track. Once hung, use your screwdriver to turn the adjustment screws clockwise—this lowers the door so it rests on the track. Slide the door open and closed a few times to check for smooth motion. If it feels sticky, give the track and wheels a spray of silicone lubricant and wipe off any excess. Adjust the screws until the door glides quietly and evenly.

That’s it! Each move is pretty straightforward, and every screw aligns to make that heavy glass slide effortlessly. (As Baker Glass advises, matching the roller size and bracket type to your original is key, so don’t skip the measuring step.) With a proper reinstall, your door should look and feel like new.
Tips & Common Mistakes
A few insider pointers will save you time (and maybe embarrassment from a shower flood):
- Measure Carefully: Always double-check that your replacement rollers match the originals in diameter and bracket style. SunnyShower’s guide stresses that ‘choosing the incorrect size’ is a ‘common oversight’ during the replacement of shower door rollers. The wrong wheel can leave the door lopsided or scraping the frame.
Clean Thoroughly: Don’t rush the cleanup. Rushing the cleaning “can doom new rollers to faster failure.” Vacuum and wipe the tracks well—a clean path means a much longer roller life.
Lubricate: Once everything is reassembled, spray silicone lubricant on the rollers and track. As the DIY pros note, neglecting lubrication “will quickly lead to noisy operation and increased wear.” A slick track makes future adjustments easier.
- Check Alignment: After hanging, step back and eyeball the door. If the gap is uneven or the glass sags on one side, tweak the roller adjustment screws until it’s level. A little patience here avoids a misaligned door (and leaks) down the line.
- Safety First: Wear gloves when handling the glass edges, and goggles when poking around hardware. Taking precautions is preferable to risking a trip to the emergency room due to a minor injury.
- Call a Friend: At least one other pair of hands makes lifting and aligning the door a breeze. Two people are better than one, and it makes the whole process more fun (plus safer for your back!).
By steering clear of these slip-ups, you’ll end up with a professional-grade fix and a new trick in your DIY toolkit.
Beyond the Door: Check the Rest of Your Bathroom
Once the door is sliding smoothly again, take a moment to inspect the rest of the shower and nearby fixtures. Often a balky door hints at other gremlins in the bathroom:
- Leaking Shower Repair: Notice water on the floor? It might be more than an alignment issue. Worn seals or corroded tracks can let water escape. Fixing this might mean re-caulking the edges or even a full leaking shower repair of the base.
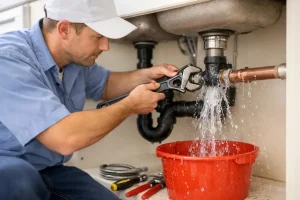
- Faucet Fixes: Still hearing drips? That’s an effortless (and annoying) fix. Call in a pro for dripping faucet repair or simple sink faucet repair services. A washer or cartridge replacement can save liters of water (and your sanity).
- Old Pipes: If the plumbing is original, aging pipes can start to fail. You might hear plumbers mention pipe relining services, which renew pipes without tearing up walls. It’s worth considering if your house is older.
- Toilet Troubles: A rocking or running loo can ruin any bathroom upgrade. If the toilet is not functioning properly, you should consider hiring toilet installation services to install a new one. A newly installed toilet can significantly improve comfort and prevent leaks.
Think of it as a mini-renovation: fixing one thing often turns into fixing two. After all, replacing a shower door roller is a perfect excuse to tackle any other bathroom annoyances.
That leaky faucet, moldy grout, or rickety toilet in the corner? Knock them all out while you’re at it, and you’ll have a bathroom that’s as smooth as the newly freed shower door roller.
Conclusion
There you have it—a once-screeching shower door, now gliding silently thanks to your shower door roller replacement skills. We’ve covered the must-have tools, a clear do-it-yourself roadmap, and even some bonus bathroom fixes to consider.
Remember: even big bath projects have tricks of the trade. As Aussie reno guidelines remind us, “Many projects are likely to require local government approval before you start.”
Replacing a shower door roller is generally such a quick job that no permit is needed, but it never hurts to check your local rules on bigger renovations.
Now it’s your turn: grab those screwdrivers and spare rollers, follow these steps for your shower door roller replacement, and get that door rolling smoothly again. For more constructive advice, check out the Home Maintenance Tips for Water‑Using Fixtures. Found these tips useful? Share them with your DIY mates or drop a comment on your bathroom triumph. Good luck—here’s to many quiet, hassle-free showers ahead
FAQs
-
Do I need special tools for shower door roller replacement?
Not really. Most jobs use basic tools like screwdrivers (flat and Phillips), a hammer, pliers and maybe a drill and level. Silicone lubricant and the new rollers complete the kit.
-
Can I do shower door roller replacement myself?
Absolutely! It’s a DIY-friendly task (not a plumbing job). Just have someone help hold the heavy glass. If any plumbing work crops up (like fixing a leak), hire a licensed pro as needed.
-
How often should I replace shower door rollers?
It depends on use. If the door starts sticking, squeaking, or dragging, it’s time. In humid Aussie bathrooms, rollers often last 2–5 years. Inspect them annually for wear.
-
Why is my shower door still leaking after roller replacement?
Leaks usually mean worn seals or misalignment, not roller wear. After replacing rollers, inspect the door seals and frame. If it’s still leaking, you might need leaking shower repair solutions.
-
Should I fix other bathroom issues during this repair?
Great idea. While you’re at it, fix any dripping taps or leaks. Call in dripping faucet repair or sink faucet repair services for dribbly taps. Consider old pipes too—a pipe relining services job can save a lot of fuss. Professional toilet installation services can replace even an old, leaky toilet while you're upgrading the bath.
-
How do I choose the right replacement rollers?
Match them exactly to your old ones. Measure the wheel diameter and note the bracket type. Using a mismatched roller (a surprisingly common mistake) can cause binding or misalignment. Go by the specs or bring the old roller to the hardware store to find a perfect match.